arcanum
·
infrastructure
DOH Setup.
Walk through to set up a DNS-Over-https server using DNSCrypt's doh-proxy and caddy reverse proxy.
In this blog, I will be doing a walk through to set up a Dns-Over-https server using DNSCrypt's doh-proxy and caddy reverse proxy.
01Why?
The following article explores the DNS-Over-https protocol and how to setup a server that uses DoH. DNS-Over-https has been around for quite a while and also has been utilized in Offensive security. Understanding how DOH server and architecture works is important in case an operator wants to utilize it as a mode of communication for their implant/C2.
02Setup
- Ubuntu : t2/t3.Medium
- Categorized Domain
03Instructions
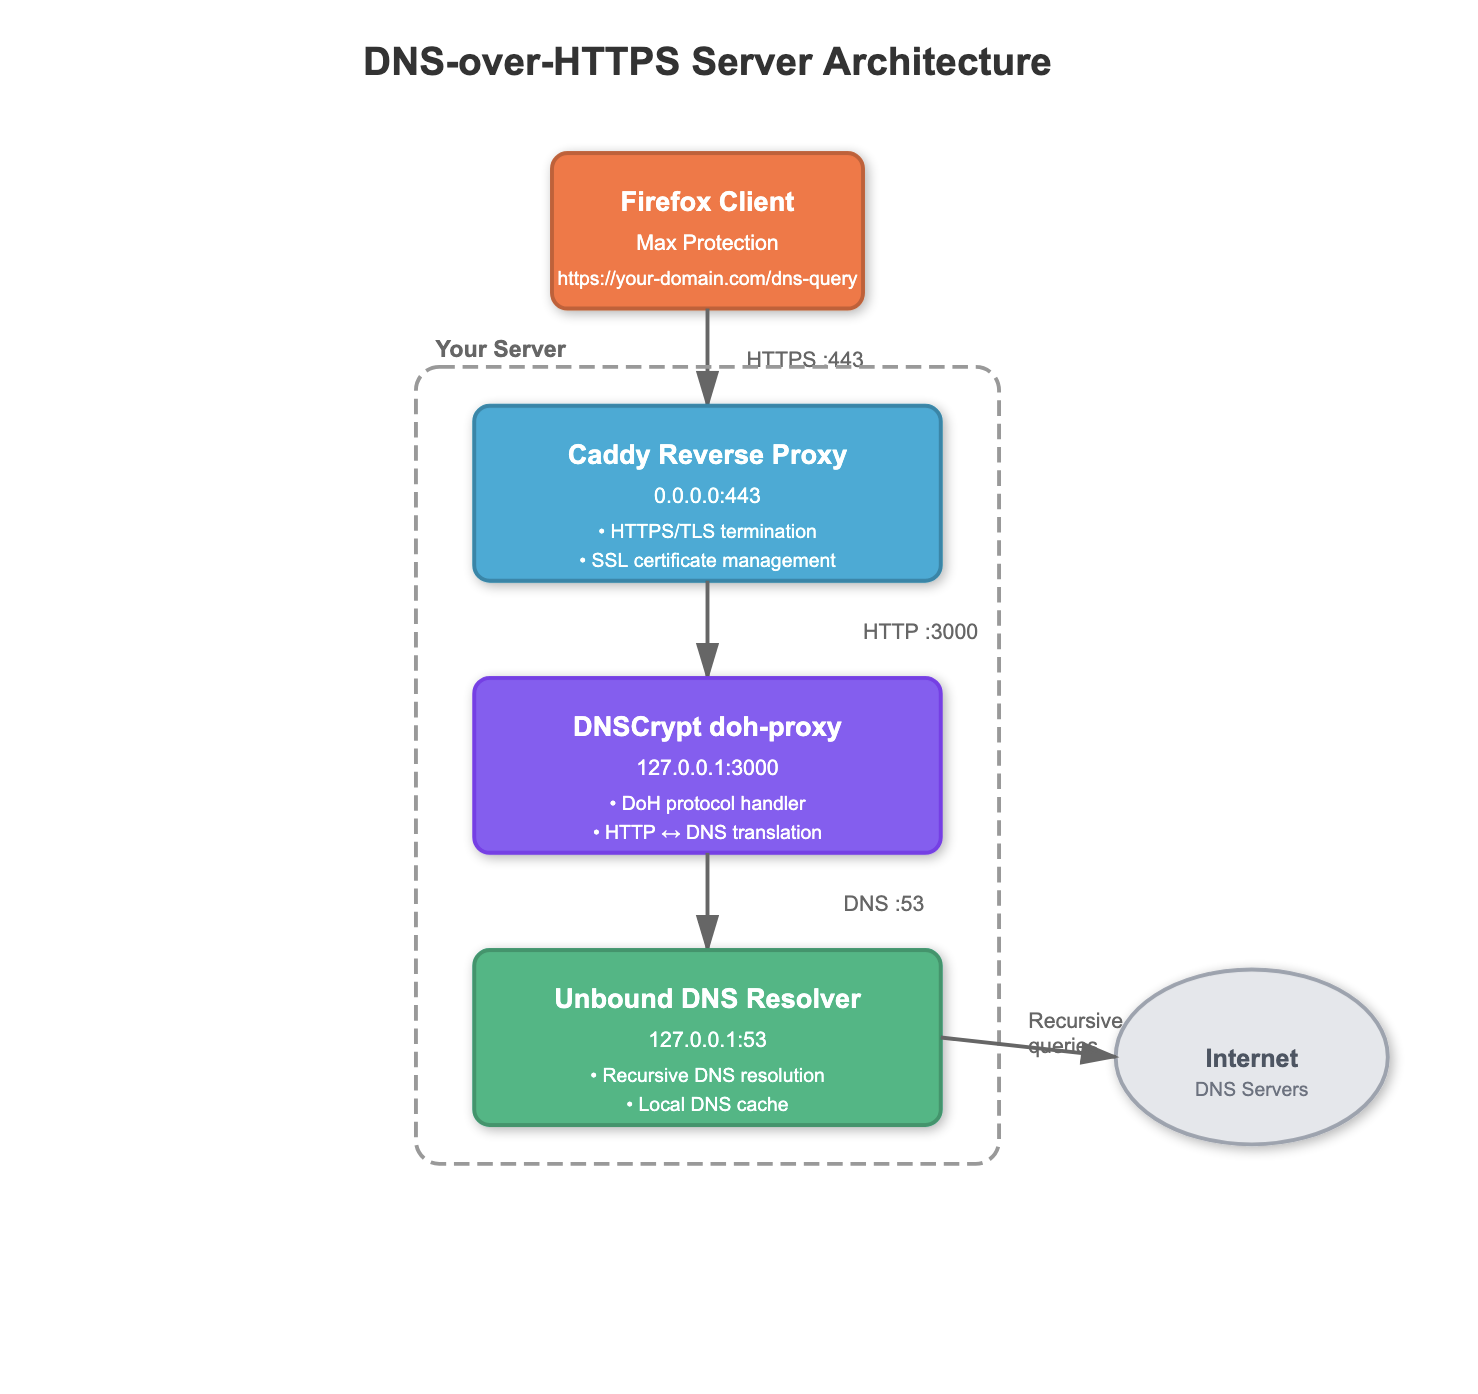
- Our DOH server resolves the queries and also manages the Dns-over-https requests i.e we aren't outsourcing our DNS load to external providers such as cloudflare.
- Assuming you have already pointed the domain to the server. lets start with setting up our own dns server that resolves the dns queries. we will use unbound
sudo apt update -y
sudo apt install unbound
sudo unbound
dig @127.0.0.1 www.google.com # To test it- Up next, we will setup our reverse proxy that will expose https (port 443) to the internet and forward the requests to the local doh-proxy. For this part, we will use caddy
sudo apt install -y debian-keyring debian-archive-keyring apt-transport-https curl
curl -1sLf 'https://dl.cloudsmith.io/public/caddy/stable/gpg.key' | sudo gpg --dearmor -o /usr/share/keyrings/caddy-stable-archive-keyring.gpg
curl -1sLf 'https://dl.cloudsmith.io/public/caddy/stable/debian.deb.txt' | sudo tee /etc/apt/sources.list.d/caddy-stable.list
chmod o+r /usr/share/keyrings/caddy-stable-archive-keyring.gpg
chmod o+r /etc/apt/sources.list.d/caddy-stable.list
sudo apt update
sudo apt install caddy- Use the following as the /etc/caddy/Caddyfile config
domain.com {
    encode zstd gzip
    route /dns-query* {
        reverse_proxy 127.0.0.1:3000
    }
    log {
        output file /var/log/caddy/doh-access.log {

        }
        format json
    }
}- Now that the reverse proxy is taken care of, the last thing that is left is the DOH-proxy itself. We will be using DNSCrypt's doh-proxy for this part.
curl --proto '=https' --tlsv1.2 -sSf https://sh.rustup.rs | sh

cargo install doh-proxy

./doh-proxy -H 'domain.com' -u 127.0.0.1:53- The server is functional, the final piece would be to test it by setting your client. There are multiple options to do this, but the simplest would be using the browser.
- Go to settings and search for DNS over HTTPs and choose Max Protection and enter the url https://domain.com/dns-query
fig.01 // browser dns settings
— darklane
// signed at depth