MASM x64.
Learning x64 assembly with MASM for Windows — from MessageBox to CreateFile and beyond.
If you are masochists like I am and take pleasure in writing some ASM — if you are interested in shellcoding and similar stuff, you probably would have found a bunch of tutorials for shellcoding in linux using NASM or other assemblers. I tried to learn ASM for windows and could not really find many posts out there that had what I needed. So here is my effort to fill the blank.
Lets try to write some really simple code in Assembly language and compile it with the help of MASM. MASM, as mentioned by official MSDN, is The Microsoft Macro Assembler. I highly suggest reading more about it on the official documentation.
We are not going to look at inline assembly in this post. We are going to write in pure MASM.
01Setup: Visual Studio
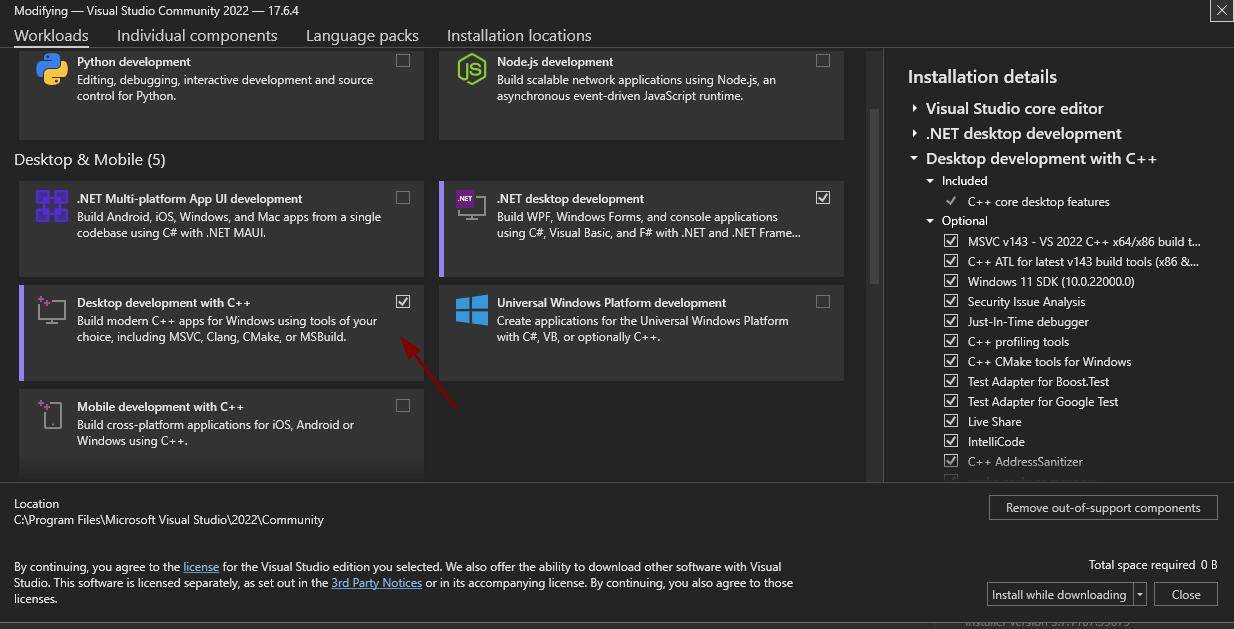
There are different better ways of doing this but for the sake of simplicity we'll be using Visual Studio community edition. Next, make sure to install the C/C++ modules.
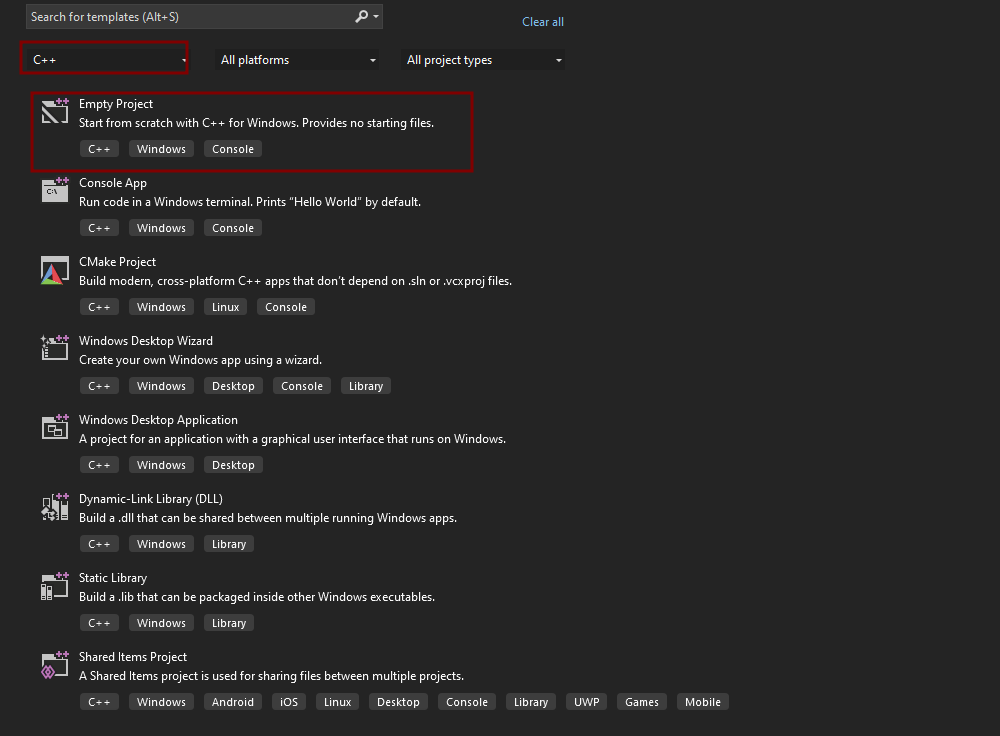
Now we can start by creating a new project. Select Empty Project and Create a new project.
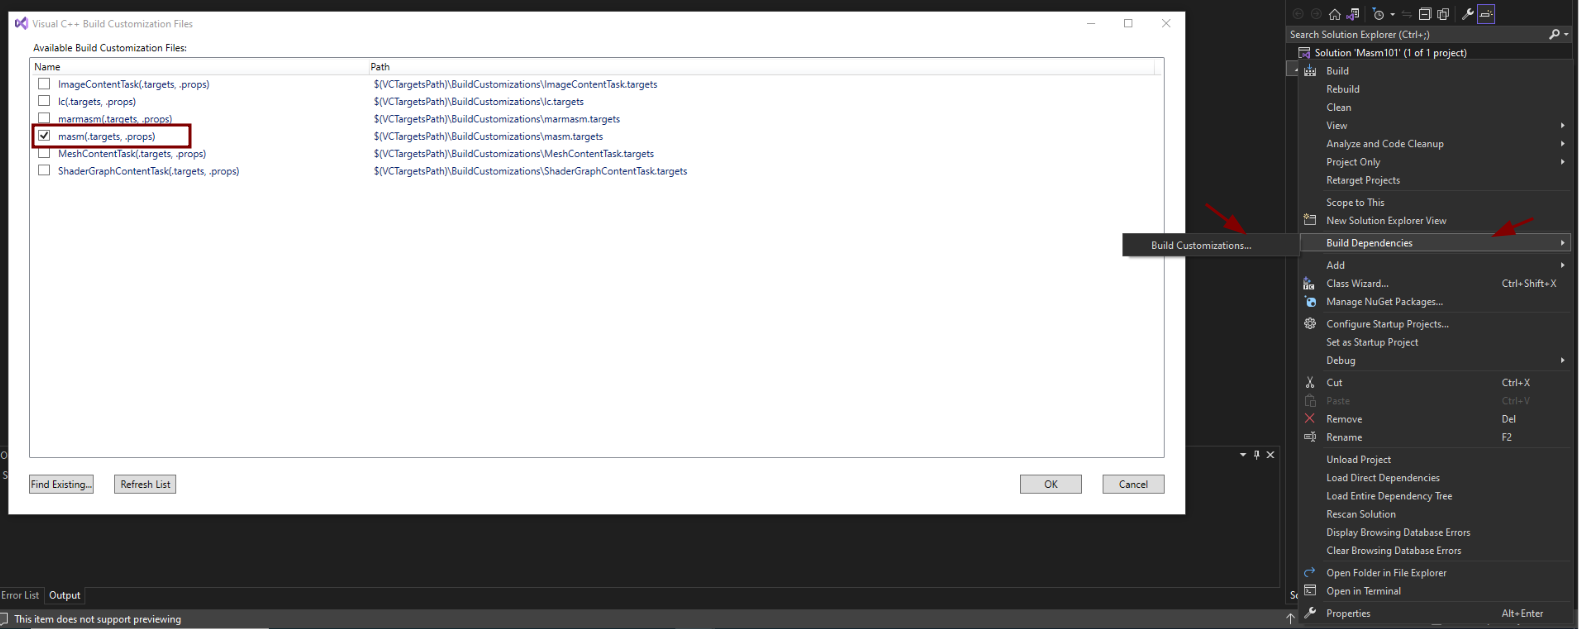
Once our project is created, click on Build Dependencies -> Build Customizations and check masm. Choose OK to save the selection.
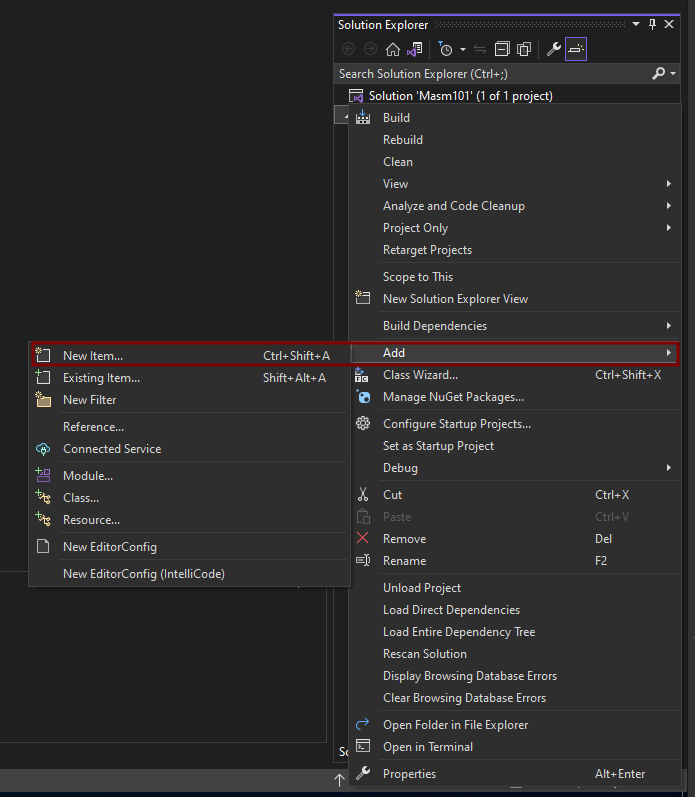
Next we add a new Item to our project. To do so right click on the project and select Add -> New Item -> Func.asm
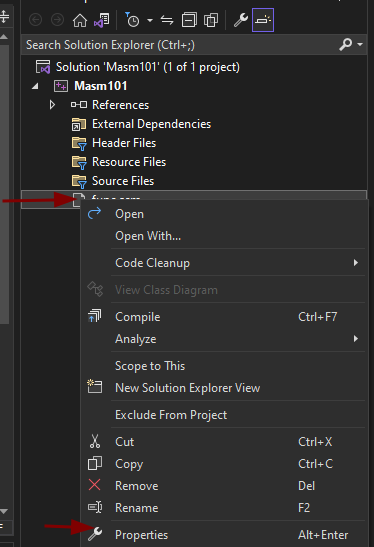
Now all that is left is to make this file be recognizable as an Assembly code. To do so Func.asm -> Properties -> Item Type -> Microsoft Macro Assembler -> Ok
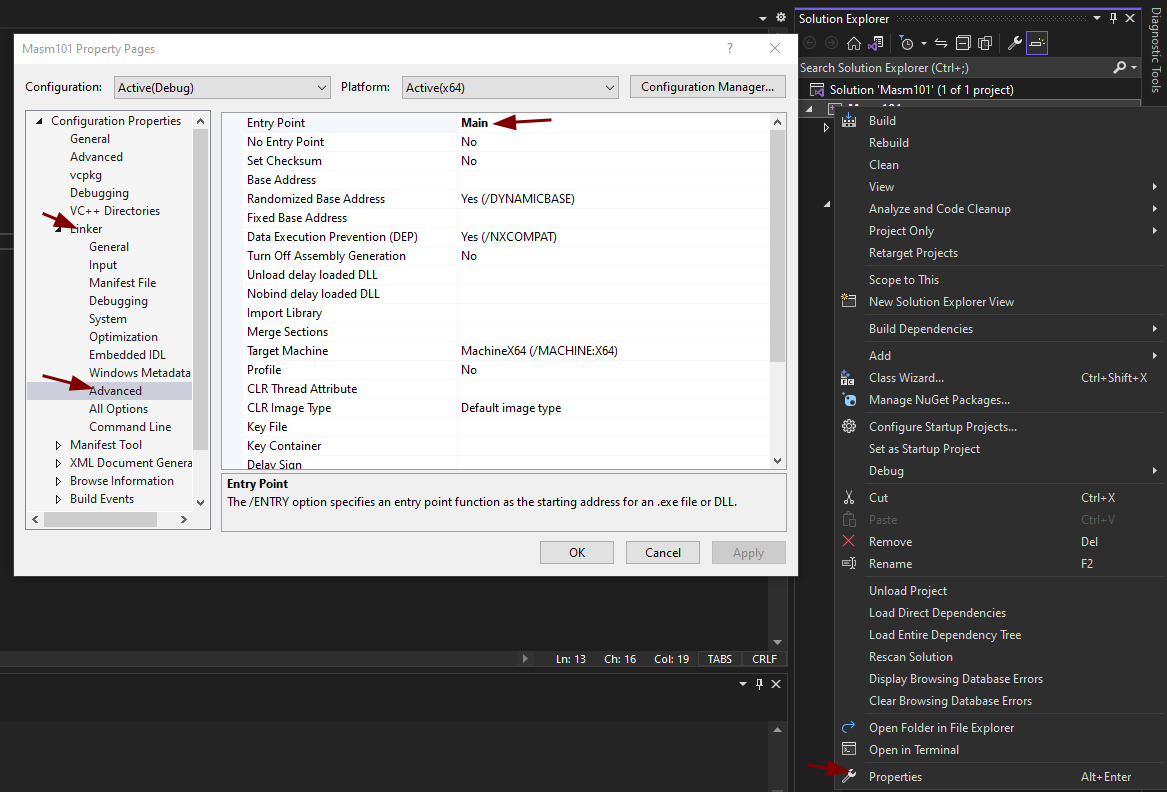
One Final thing to set is the entry point in the linker. right click project -> Properties -> linker -> EntryPoint -> Main
Main is the Procedure we are using in our assembly code
02Code
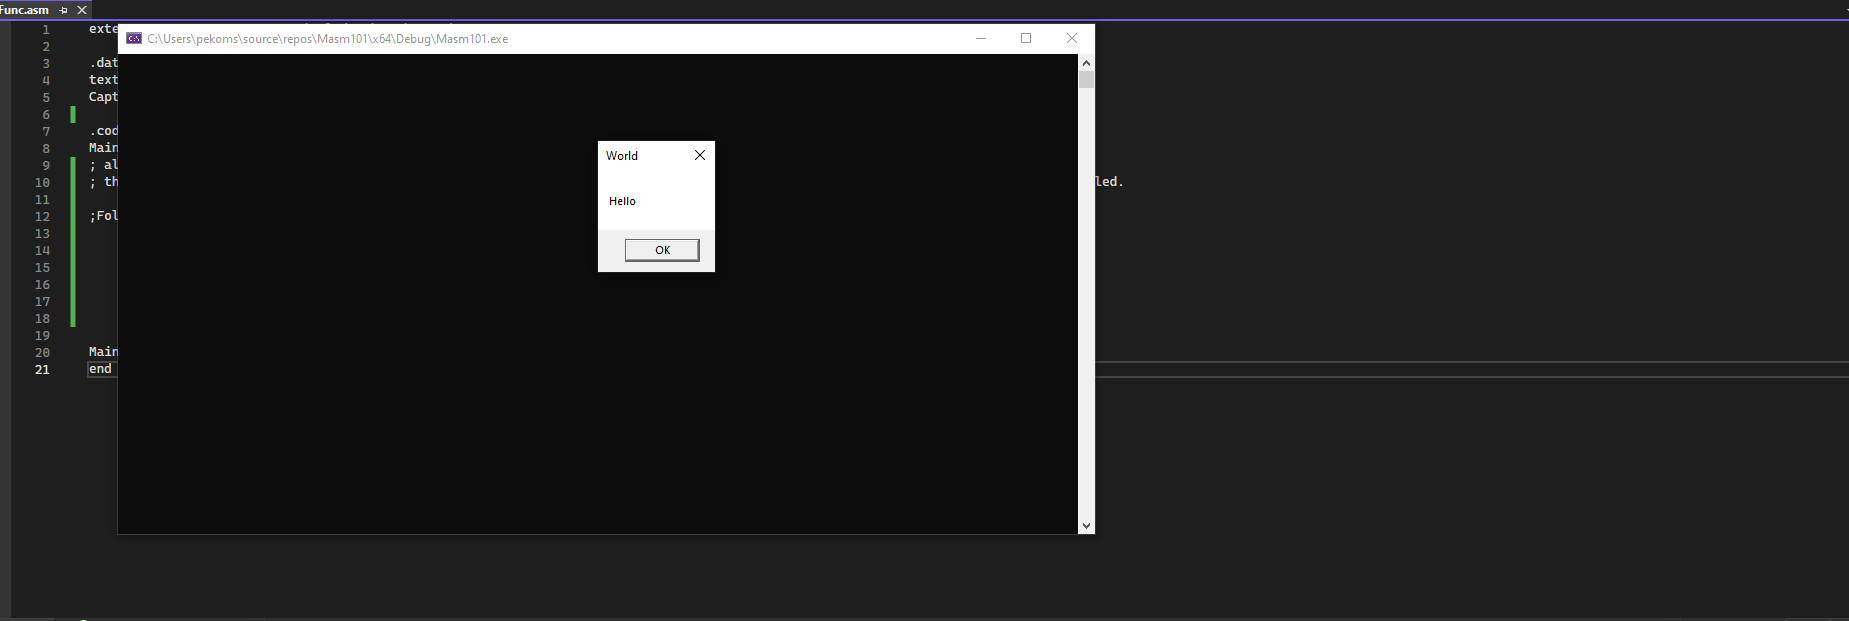
According to the gods of Windows, the first program must always be popping a MessageBox. Lets follow the ritual.
extern MessageBoxA : proc ; extern the messagebox procedure

.data ; start of .data section
text db "Hello",0
Caption db "World",0

.code
Main proc
; allocate stack frame of size 8 bytes
    sub rsp,8
;Following x64 Calling convention as dictated by MSDN.
    xor rcx,rcx   ; First argument of the function MessageBoxA . The value is 0
    lea rdx,text  ; Second argument which loads the value of the variable 'data'
    lea r8,Caption ; Third argument which loads the value of the variable 'db'
    xor r9d,r9d   ; Fourth argument  . The value is 0
    call MessageBoxA ; Call to the MessageBox Function .
    add rsp,8
    ret
Main endp
end
The comments in the code should be pretty self explanatory. Run the code and you should see a neat MessageBox popping.
The code is working as expected. But lets take a bit deeper look. Let start with the first line, what does it exactly mean and why have we used it?
extern MessageBoxA : proc This line tells the MASM that our code is referencing to an external procedure (A procedure is like a function) called MessageBoxA. You can compare it with something like #include Headername in C or import os in python. To make our life easier, we simply use the Procedure that's already included. We do not need to do any fancy syscalls, like we do in Linux, YET!!!
Data Section
.data The data section is where our initialized static variables are defined. We define two variables each with size of a byte. DB : define byte
Code Section
.code The code section is where our executable code resides.
We begin the procedure with the directive Main proc and we end the procedure with Main endp. Any procedure you want to implement needs to have a name proc syntax and it must end with name endp. And wrap up the entire code with the end directive.
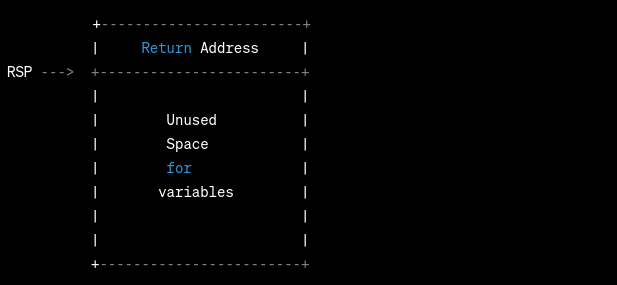
The sub rsp,8 allocates 8 bytes of space on the stack as our stack frame needs to be big enough. Refer to this StackOverflow thread if you are not aware of what a stack frame is.
We only need 8 bytes because we have no local variables or non-volatile registers. The only thing that needs some space is the Function CALL which pushes the Return address onto the stack when the function is called.
Note that, in x64 assembly, by default a 32bytes (20h) shadow space is allocated to the stack above the return address to align the stack. If we are passing the arguments using registers only like in the above case we do not need to worry about allocating more space.
MASM for 64 bit follows x64 Calling Convention which requires you to pass the first argument in rcx, 2nd in rdx, 3rd in r8 and 4th in r9.
03More Than 4 Arguments
The MessageBoxA only has 4 arguments, so it was convenient for us to use the 4 registers. But what if there are more arguments, say, the CreateFileA function requires more than 4 arguments. How would we pass the other arguments? MSDN states that we push the rest of the arguments onto the stack in reverse order.
Lets look at the code below that creates a file called Temp.txt
extern CreateFileA : proc
GENERIC_READ            equ 080000000h
GENERIC_WRITE           equ 040000000h
FILE_ATTRIBUTE_NORMAL   equ 080h
CREATE_ALWAYS           equ 4

.data
    Filename db "Temp.txt",0

.code

Main proc
    sub rsp,40h
    mov rcx,OFFSET Filename ; 1st arg
    mov rdx,GENERIC_READ or GENERIC_WRITE ;2nd arg
    xor r8,r8 ; 3rd arg
    xor r9,r9 ; 4th arg
    mov qword ptr [rsp+30h],0  ; 7th (addr = 48)
    mov qword ptr [rsp+28h],FILE_ATTRIBUTE_NORMAL  ; 6th arg (addr = 40)
    mov qword ptr [rsp+20h],CREATE_ALWAYS  ; 5th  (addr = 32)
    call CreateFileA
    add rsp,40h
    ret
Main endp
end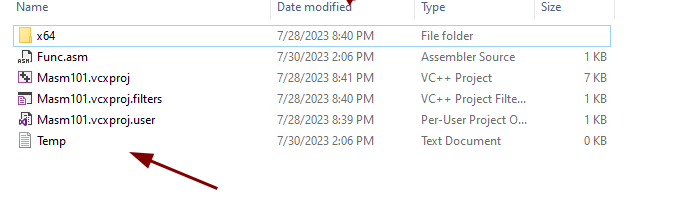
It works as intended. Lets break down the code from the mov qword ptr [rsp+30h],0 instruction as it looks kinda confusing. Why are we moving the 7th argument onto the stack? Didn't we mention before that MSDN states that we PUSH the arguments onto the stack? Then why are we MOVING it onto the stack?
Lets take a step back and draw the stack from its base.
Step 1: The Stack is empty initially
Step 2: The Main Procedure is called and we allocate 40h (64 bytes) of space for our stack frame. So Our stack looks somewhat like this.
To get a sense of practicality, lets open x64 dbg and see the same. 000000EE1CDBF748 (lets call base addr) was the base and after we allocated 40h we are at the address 000000EE1CDBF708 (lets call this Main addr). This entire operation was done by the assembly code sub rsp,40h

Step 3: We passed the 4 arguments using registers and then we moved the 7th argument onto the stack. The below image outlines the values of the registers.

Now lets move the 7th argument. The stack now looks like this. We moved the value 0 to rsp+30h position. If we calculate 000000EE1CDBF708+30h we get to the address EE 1CDB F738 which is exactly where our stack is at and it has the value 0 stored in it. Notice that the value is stored at location which is closest to 000000EE1CDBF748 (Base addr).

Step 4: Lets pace up and mov the other values onto the stack

We see the values 4, 80 and 0 on the stack respectively and if you have noticed, the values are above each other. Which means they are PUSHED onto the stack. And if you are wondering why they are pushed in the following way — this is quoted from MASM32.com:
"Parameter order on stack. The Pascal order means that the first parameter has the highest address on the stack and the last parameter has the lowest address, immediately above the return address. If parameters are put on the stack by push instructions then the first parameter is pushed first because the stack grows downwards. The C order is opposite: The first parameter has the lowest address, immediately above the return address, and the last parameter has the highest address. This method was introduced with the C language in order to make it possible to call a function with a variable number of parameters, such as printf."
And lastly the function call to CreateFileA is called and we deallocate the stack space with the instruction add rsp,40h. This is what the stack looks at the end:

You might be wondering about the empty space below and above the arguments in the stack — it is because those are simply the placeholders if we were to push the rest of the arguments onto the stack.
I would highly suggest writing some simple ASM code to truly understand it.